Genshin Damage Calculator
Single-character damage calculator
How to use it25,655 crit
Damage per hit
Click a row to load it into the multipliers above| Attack | Non-CRIT | CRIT | Average |
|---|---|---|---|
| Normal Attack | |||
| 1-Hit DMGnon-crit 827 · crit 3,197 | 827 | 3,197 | 1,775 |
| 2-Hit DMGnon-crit 851 · crit 3,290 | 851 | 3,290 | 1,826 |
| 3-Hit DMGnon-crit 1,076 · crit 4,163 | 1,076 | 4,163 | 2,311 |
| 4-Hit DMGnon-crit 1,157 · crit 4,476 | 1,157 | 4,476 | 2,485 |
| 5-Hit DMGnon-crit 1,207 · crit 4,669 | 1,207 | 4,669 | 2,592 |
| 6-Hit DMGnon-crit 1,515 · crit 5,861 | 1,515 | 5,861 | 3,254 |
| Total DMGnon-crit 6,633 · crit 25,655 | 6,633 | 25,655 | 14,242 |
| Charged Attack25 | |||
| Charged Attacknon-crit 2,397 · crit 9,270 | 2,397 | 9,270 | 5,146 |
| Plunging Attack | |||
| Plunge DMGnon-crit 1,153 · crit 4,461 | 1,153 | 4,461 | 2,476 |
| Low Plunge DMGnon-crit 2,306 · crit 8,919 | 2,306 | 8,919 | 4,951 |
| High Plunge DMGnon-crit 2,880 · crit 11,141 | 2,880 | 11,141 | 6,184 |
| Elemental Skill30.0%6.3%8s9s16s | |||
| Blood Blossom DMGnon-crit 1,429 · crit 5,529 | 1,429 | 5,529 | 3,069 |
| Elemental Burst10.2%13.6%15s60 | |||
| Skill DMGnon-crit 6,129 · crit 23,707 | 6,129 | 23,707 | 13,160 |
| Low HP Skill DMGnon-crit 7,661 · crit 29,633 | 7,661 | 29,633 | 16,450 |
non-crit 6,633 · crit 25,655
Reactions click to apply
Formula & contribution
Hu Tao expected damage 14,242.
The math
How Genshin damage is calculated
Every number above is one product of six factors — the official damage formula, following KeqingMains theorycrafting.
Official character art
Featured carries
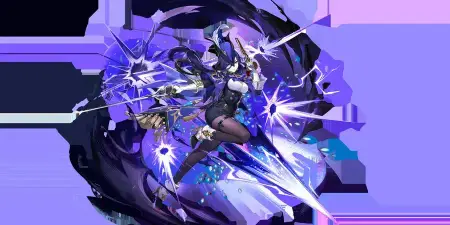
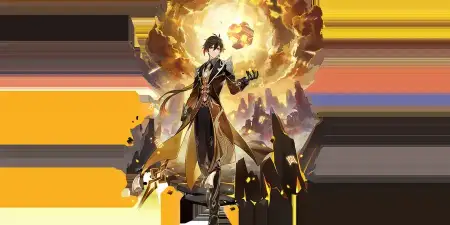
Every character in the roster has a reference panel. Start with one of these — official art, all seven elements, one calculator.





Official media
Official videos
Character demos and version trailers straight from the official Genshin Impact channel.
Character demos & version trailers
Watch official trailers, character demos and teasers on the Genshin Impact YouTube channel.
Visit the official channelWhy this calculator beats the spreadsheet
Zero-input presets
Every character loads at level 90 with their best weapon and a sample end-game artifact build, so you see a realistic number before touching anything. Edit any of it to match your own account.
Your numbers, your call
Set each character’s level and weapon yourself — every field is yours to change, and the damage updates as you pick.
Weapon comparison
Switch weapons and watch the percentage gain live. See whether that 5-star is actually an upgrade before you spend your pulls.
Six multipliers, in the open
Base × DMG bonus × CRIT × reaction × DEF × RES — every multiplier is its own editable zone, with the full formula chain and each zone’s contribution to the result.
Reference damage for every character
Level 90, talent 10, best weapon, a sample end-game artifact build, vs a level-90 enemy with 10% resistance, with no elemental reaction applied so every character is measured the same way. Each number is a single representative talent, named on the card — whichever has the highest raw multiplier out of the Normal-attack combo, the Charged attack, and the best single Skill or Burst hit. Open the calculator above to swap in your own weapon, artifacts, constellation and team buffs.
 Pyro characters
(18)
Pyro characters
(18)

Hu Tao
Pyro · ★★★★★
14,242
Normal Attack combo · no reaction
Charge-attack Vaporize carry. Low base ATK — scales off HP and EM.

Arlecchino
Pyro · ★★★★★
45,041
Normal Attack combo · no reaction
Normal-attack Pyro carry. Cannot be healed — scales off ATK and CRIT.

Mavuika
Pyro · ★★★★★
47,560
Elemental Burst · no reaction
Natlan Pyro hypercarry. High base ATK, huge burst nuke.

Diluc
Pyro · ★★★★★
29,264
Normal Attack combo · no reaction
Classic Vaporize claymore carry. Consistent, easy rotation.

Klee
Pyro · ★★★★★
63,002
Elemental Burst · no reaction
Charge-attack Pyro DPS. Wants CRIT, ATK and Pyro DMG.

Yoimiya
Pyro · ★★★★★
38,464
Normal Attack combo · no reaction
Single-target normal-attack Vaporize DPS.

Dehya
Pyro · ★★★★★
18,241
Normal Attack combo · no reaction
Tanky off-field Pyro. Scales with HP and ATK.

Lyney
Pyro · ★★★★★
19,974
Charged Attack · no reaction
Charged-shot Mono-Pyro DPS.

Xiangling
Pyro · ★★★★
9,569
Normal Attack combo · no reaction
Best free off-field Pyro DPS. Pyronado snapshots buffs.

Bennett
Pyro · ★★★★
9,738
Normal Attack combo · no reaction
Best buffer in the game. Flat ATK buff scales off his base ATK.

Amber
Pyro · ★★★★
24,364
Elemental Burst · no reaction
Free starter bow. Decent Burst support.

Xinyan
Pyro · ★★★★
20,488
Normal Attack combo · no reaction
Physical/Pyro hybrid claymore.

Yanfei
Pyro · ★★★★
32,310
Charged Attack · no reaction
Ranged Vaporize catalyst DPS.

Thoma
Pyro · ★★★★
9,433
Normal Attack combo · no reaction
Shield support with off-field Pyro.

Chevreuse
Pyro · ★★★★
12,471
Elemental Burst · no reaction
Overload enabler that shreds RES.

Gaming
Pyro · ★★★★
22,431
Normal Attack combo · no reaction
Plunge Vaporize DPS.

Durin
Pyro · ★★★★★
23,436
Elemental Burst · no reaction
Pyro sword DPS. Verify stats against the live game.

Nicole
Pyro · ★★★★★
21,307
Elemental Burst · no reaction
Pyro catalyst.
 Hydro characters
(16)
Hydro characters
(16)

Neuvillette
Hydro · ★★★★★
180,655
Charged Attack · no reaction
Charged-attack HP-scaling carry. HP% and CRIT DMG are his best stats.

Furina
Hydro · ★★★★★
10,396
Normal Attack combo · no reaction
Off-field Hydro DPS and team buffer. Scales with HP.

Yelan
Hydro · ★★★★★
10,085
Normal Attack combo · no reaction
Off-field Hydro DPS. Pure HP scaling.

Mona
Hydro · ★★★★★
31,076
Elemental Burst · no reaction
Omen debuff amplifies team damage — nuke enabler.

Tartaglia
Hydro · ★★★★★
31,988
Elemental Burst · no reaction
On-field Hydro DPS with a huge Burst nuke.

Sangonomiya Kokomi
Hydro · ★★★★★
8,175
Normal Attack combo · no reaction
Healer with strong off-field Hydro application.

Nilou
Hydro · ★★★★★
4,921
Normal Attack combo · no reaction
Bloom enabler. Full HP scaling.

Kamisato Ayato
Hydro · ★★★★★
23,912
Normal Attack combo · no reaction
On-field Hydro slashes. Scales with ATK and CRIT.

Sigewinne
Hydro · ★★★★★
5,545
Normal Attack combo · no reaction
HP-scaling Hydro healer/buffer.

Mualani
Hydro · ★★★★★
10,020
Normal Attack combo · no reaction
Natlan Hydro on-field Vaporize DPS.

Xingqiu
Hydro · ★★★★
11,994
Elemental Skill · no reaction
Best 4-star Hydro sub-DPS. Enables Vaporize teams.

Barbara
Hydro · ★★★★
3,859
Normal Attack combo · no reaction
Free Hydro healer.

Candace
Hydro · ★★★★
9,849
Normal Attack combo · no reaction
Hydro infusion support. HP scaling.

Aino
Hydro · ★★★★
11,026
Normal Attack combo · no reaction
Hydro Claymore sub-DPS (6.0). First Hydro claymore.

Dahlia
Hydro · ★★★★
14,935
Elemental Burst · no reaction
Hydro sword support.

Columbina
Hydro · ★★★★★
3,392
Normal Attack combo · no reaction
Hydro catalyst.
 Electro characters
(19)
Electro characters
(19)

Raiden Shogun
Electro · ★★★★★
23,250
Elemental Burst · no reaction
On-field burst DPS. Scales with Energy Recharge; pair with Bennett for the classic hypercarry.

Keqing
Electro · ★★★★★
12,572
Normal Attack combo · no reaction
Electro sword DPS. Fast, crit-heavy, Aggravate-friendly.

Yae Miko
Electro · ★★★★★
19,434
Elemental Burst · no reaction
Off-field Electro DPS totems. Scales with ATK and CRIT.

Cyno
Electro · ★★★★★
14,737
Normal Attack combo · no reaction
Aggravate burst DPS. Wants EM and CRIT.

Clorinde
Electro · ★★★★★
45,803
Elemental Burst · no reaction
Aggravate sword DPS.

Varesa
Electro · ★★★★★
42,794
Elemental Burst · no reaction
Natlan plunge Electro DPS.

Fischl
Electro · ★★★★
11,465
Normal Attack combo · no reaction
Best 4-star off-field Electro. Oz stays on field.

Beidou
Electro · ★★★★
23,379
Normal Attack combo · no reaction
Counter + off-field Electro.

Lisa
Electro · ★★★★
15,219
Elemental Skill · no reaction
DEF shred support with her Burst.

Razor
Electro · ★★★★
29,830
Normal Attack combo · no reaction
Physical claymore carry.

Kujou Sara
Electro · ★★★★
21,680
Elemental Burst · no reaction
ATK buffer for Electro teams.

Dori
Electro · ★★★★
14,935
Normal Attack combo · no reaction
Healer + Electro battery.

Sethos
Electro · ★★★★
7,155
Charged Attack · no reaction
Aggravate bow DPS.

Ororon
Electro · ★★★★
10,629
Elemental Skill · no reaction
Electro-Charged off-field support.

Flins
Electro · ★★★★★
18,802
Normal Attack combo · no reaction
Electro Polearm DPS (6.0). Lunar-Charged carry.

Alyosha
Electro · ★★★★
13,079
Elemental Skill · no reaction
New in 7.0. Electro support. Verify stats.

Kuki Shinobu
Electro · ★★★★
6,759
Normal Attack combo · no reaction
Hyperbloom trigger and healer. Build full Elemental Mastery.

Ineffa
Electro · ★★★★★
48,617
Elemental Burst · no reaction
Electro polearm DPS.

Iansan
Electro · ★★★★
23,700
Elemental Burst · no reaction
Electro polearm.
 Cryo characters
(21)
Cryo characters
(21)

Ganyu
Cryo · ★★★★★
19,244
Charged Attack · no reaction
Charged-shot Melt or Freeze carry. High raw multipliers.

Kamisato Ayaka
Cryo · ★★★★★
28,071
Normal Attack combo · no reaction
Freeze burst carry. Blizzard Strayer + Cryo Resonance gives huge free CRIT Rate.

Eula
Cryo · ★★★★★
47,912
Normal Attack combo · no reaction
Physical nuke carry. Burst stacks damage over time.

Shenhe
Cryo · ★★★★★
17,658
Normal Attack combo · no reaction
Cryo buffer. Flat Cryo bonus scales off her ATK.

Wriothesley
Cryo · ★★★★★
52,762
Elemental Burst · no reaction
On-field Cryo catalyst DPS.

Citlali
Cryo · ★★★★★
20,959
Elemental Burst · no reaction
Melt/Freeze shield support.

Qiqi
Cryo · ★★★★★
17,214
Elemental Burst · no reaction
Pure healer. Scales with ATK.

Kaeya
Cryo · ★★★★
15,925
Normal Attack combo · no reaction
Free off-field Cryo.

Chongyun
Cryo · ★★★★
15,826
Normal Attack combo · no reaction
Cryo infusion support.

Diona
Cryo · ★★★★
9,016
Normal Attack combo · no reaction
Shield + heal + battery.

Rosaria
Cryo · ★★★★
13,179
Normal Attack combo · no reaction
Off-field Cryo DPS + crit share.

Layla
Cryo · ★★★★
5,127
Normal Attack combo · no reaction
Strong HP-scaling shield.

Charlotte
Cryo · ★★★★
6,307
Normal Attack combo · no reaction
Cryo healer.

Mika
Cryo · ★★★★
11,129
Normal Attack combo · no reaction
Physical buffer + healer.

Freminet
Cryo · ★★★★
30,232
Normal Attack combo · no reaction
Physical + Cryo hybrid.

Aloy
Cryo · ★★★★★
30,162
Elemental Burst · no reaction
Freeze bow DPS.

Lohen
Cryo · ★★★★★
66,701
Elemental Burst · no reaction
New in 6.6 (Snezhnaya). Verify stats.

Odette
Cryo · ★★★★★
70,124
Elemental Skill · no reaction
Version 7.0 Snezhnaya character. Cryo sword DPS.

Sandrone
Cryo · ★★★★★
11,476
Charged Attack · no reaction
Cryo claymore.

Skirk
Cryo · ★★★★★
57,445
Elemental Burst · no reaction
Cryo sword DPS.

Escoffier
Cryo · ★★★★★
46,869
Elemental Burst · no reaction
Cryo polearm.
 Anemo characters
(22)
Anemo characters
(22)

Xiao
Anemo · ★★★★★
34,529
Normal Attack combo · no reaction
Plunge-attack Anemo carry. High base ATK; wants ATK%, Anemo DMG and CRIT.

Venti
Anemo · ★★★★★
20,320
Elemental Skill · no reaction
Crowd-control support. VV shred.

Kaedehara Kazuha
Anemo · ★★★★★
16,667
Normal Attack combo · no reaction
Best Anemo buffer. EM scales team damage.

Wanderer
Anemo · ★★★★★
50,725
Elemental Burst · no reaction
Anemo normal-attack carry.

Xianyun
Anemo · ★★★★★
52,737
Elemental Skill · no reaction
Plunge enabler + healer.

Chasca
Anemo · ★★★★★
25,321
Normal Attack combo · no reaction
Natlan Anemo multi-element DPS.

Sucrose
Anemo · ★★★★
9,909
Elemental Skill · no reaction
EM buffer + crowd control.

Sayu
Anemo · ★★★★
19,293
Normal Attack combo · no reaction
Healer + exploration roll.

Shikanoin Heizou
Anemo · ★★★★
18,962
Elemental Burst · no reaction
Anemo melee DPS.

Faruzan
Anemo · ★★★★
17,642
Elemental Burst · no reaction
Anemo damage buffer.

Lynette
Anemo · ★★★★
13,543
Elemental Skill · no reaction
Off-field Anemo support.

Lan Yan
Anemo · ★★★★
36,061
Elemental Burst · no reaction
Anemo shielder.

Jean
Anemo · ★★★★★
16,588
Elemental Burst · no reaction
Anemo healer and Sunfire enabler. Launch character — complete roster coverage.

Aether
Anemo · ★★★★★
19,369
Normal Attack combo · no reaction
Traveler (multi-element) — stat line shown for the Anemo kit.

Lumine
Anemo · ★★★★★
19,369
Normal Attack combo · no reaction
Traveler (multi-element) — stat line shown for the Anemo kit.

Varka
Anemo · ★★★★★
29,532
Normal Attack combo · no reaction
Anemo claymore.

Yumemizuki Mizuki
Anemo · ★★★★★
8,129
Normal Attack combo · no reaction
Anemo catalyst support. Scales with Elemental Mastery.

Prune
Anemo · ★★★★
11,852
Elemental Skill · no reaction
Anemo catalyst.

Ifa
Anemo · ★★★★
20,993
Elemental Burst · no reaction
Anemo catalyst support.

Jahoda
Anemo · ★★★★
9,236
Elemental Skill · no reaction
Anemo bow support.

Manekin
Anemo · ★★★★★
23,643
Elemental Burst · no reaction
Miliastra Wonderland character — placeholder stat line borrowed from the Anemo Traveler.

Manekina
Anemo · ★★★★★
23,643
Elemental Burst · no reaction
Miliastra Wonderland character — placeholder stat line borrowed from the Anemo Traveler.
 Geo characters
(14)
Geo characters
(14)

Zhongli
Geo · ★★★★★
33,133
Elemental Burst · no reaction
Burst nuke or shield support. Planet Befall has one of the highest single-hit multipliers.

Albedo
Geo · ★★★★★
24,045
Elemental Burst · no reaction
Off-field Geo. DEF scaling.

Arataki Itto
Geo · ★★★★★
60,010
Normal Attack combo · no reaction
Geo DEF-scaling carry.

Navia
Geo · ★★★★★
32,459
Normal Attack combo · no reaction
Geo ATK-scaling nuke.

Xilonen
Geo · ★★★★★
6,131
Normal Attack combo · no reaction
DEF support. Shreds RES.

Noelle
Geo · ★★★★
19,274
Normal Attack combo · no reaction
DEF-scaling shielder/DPS.

Ningguang
Geo · ★★★★
14,214
Elemental Skill · no reaction
Geo catalyst DPS.

Gorou
Geo · ★★★★
7,517
Normal Attack combo · no reaction
Geo DEF buffer.

Yun Jin
Geo · ★★★★
6,182
Elemental Skill · no reaction
Normal-attack buffer.

Kachina
Geo · ★★★★
15,134
Elemental Burst · no reaction
Natlan Geo support.

Chiori
Geo · ★★★★★
32,743
Elemental Burst · no reaction
Off-field Geo sub-DPS. Scales with ATK and DEF conversion.

Zibai
Geo · ★★★★★
13,056
Normal Attack combo · no reaction
Geo sword DPS.

Illuga
Geo · ★★★★
54,537
Elemental Burst · no reaction
Geo polearm.

Linnea
Geo · ★★★★★
19,027
Elemental Skill · no reaction
Geo bow.
 Dendro characters
(12)
Dendro characters
(12)

Alhaitham
Dendro · ★★★★★
26,773
Elemental Skill · no reaction
Spread DPS. Dendro reactions scale with Elemental Mastery — EM sands are optimal.

Tighnari
Dendro · ★★★★★
6,501
Charged Attack · no reaction
Spread charged-shot DPS.

Nahida
Dendro · ★★★★★
15,380
Elemental Skill · no reaction
Best Dendro support. EM scaling.

Baizhu
Dendro · ★★★★★
6,902
Normal Attack combo · no reaction
Dendro healer + shield.

Kinich
Dendro · ★★★★★
57,937
Elemental Skill · no reaction
Natlan Dendro DPS.

Emilie
Dendro · ★★★★★
23,812
Normal Attack combo · no reaction
Off-field Dendro DPS.

Collei
Dendro · ★★★★
9,314
Normal Attack combo · no reaction
Free off-field Dendro.

Yaoyao
Dendro · ★★★★
11,168
Normal Attack combo · no reaction
Dendro healer.

Kirara
Dendro · ★★★★
23,762
Elemental Burst · no reaction
Dendro shielder.

Kaveh
Dendro · ★★★★
14,417
Normal Attack combo · no reaction
Bloom enabler.

Lauma
Dendro · ★★★★★
10,730
Elemental Skill · no reaction
Dendro Catalyst support (6.0). Enables Lunar-Bloom.

Nefer
Dendro · ★★★★★
42,399
Elemental Burst · no reaction
Dendro catalyst.
Deep dives
Guides, by topic
The full mechanics breakdowns live on dedicated pages — formula and reactions, build choices, and how to raise damage. Each is written answer-first and cites its sources.
Damage formula & reactions
The five-multiplier chain, Vaporize ×1.5 / Melt ×2.0 coefficients, EM scaling, and DEF/RES math — with worked examples.
Read the guide →Weapon, artifact & talent builds
Rankings by computed damage impact, artifact set and main-stat picks, constellation value tiers, and talent priority.
Read the guide →Increase damage & fix mistakes
Buffs ranked by real multiplier impact, team buff setups, and the build mistakes that silently waste DPS.
Read the guide →How to use the calculator
- 01
Pick a character
Open the roster and search or filter by element. The character loads at level 90 with their best weapon and a sample artifact build; edit the fields to match your own.
- 02
The six multipliers
Base, DMG bonus, CRIT, reaction, enemy DEF and enemy RES — the damage formula laid out as six editable zones.
- 03
Damage updates live
There is no Calculate button. The result, the formula chain and every zone’s contribution update as you type.
- 04
Change one thing
Edit a single field and watch its multiplier — and the final number — move. That is the answer to “what is this stat worth?”.
- 05
See every hit, not just one
The Damage tab lists each hit a talent produces — normal, charged, skill and burst — with its Non-CRIT, CRIT and average. Click a row to load that hit into the multipliers above.
- 06
Check the reference table
Every character’s whiteboard number, measured the same way with no reaction, is listed further down the page.
Data & updates
Genshin Damage Calculator is an independent fan-made tool built and maintained by Kai Ren, a long-time Genshin Impact player. Character base stats, weapon stats, and talent multipliers are maintained against the live game and refreshed within 48 hours of each version patch. The calculation engine itself rarely changes — most updates are data refreshes.
- Version 7.0 data snapshot — Snezhnaya patch (new characters, weapons & artifact sets) Aug 12, 2026
- Six-multiplier damage engine (official formula)Current
- New characters & weaponsAdded each patch
Named sources
As stated above, “character base stats, weapon stats, and talent multipliers are maintained against the live game and refreshed within 48 hours of each version patch.” Every snapshot is cross-checked against HoYoverse’s official Genshin Impact site and the community-maintained Genshin Impact Wiki; patch timing follows announcements on the official Genshin Impact YouTube channel.
“When characters or enemies attack their targets, they deal damage (abbreviated as DMG) based on their own and their target’s attributes. … There are eight damage types: seven Elemental and one Physical.”
— Genshin Impact Wiki, “Damage”, section “Damage”
Maintained by
Kai Ren
Independent developer and long-time Genshin Impact player. Maintains the character and weapon data against the live game, cross-checks every multiplier against the official damage formula and KQM theorycrafting, and refreshes the snapshot within 48 hours of each version patch.
Frequently asked questions
How is Genshin Impact damage calculated?
A single hit multiplies six independent factors: Base damage (the scaling stat × talent multiplier), a DMG Bonus factor (elemental goblet, weapon passives, set bonuses), a CRIT factor (1 + Crit Rate × Crit DMG for expected damage), a reaction factor, and two defensive factors — enemy DEF and enemy RES. The full formula is Damage = Base damage × (1 + DMG Bonus) × CRIT × Reaction × DEF multiplier × RES multiplier. Because every factor multiplies the others, stacking one factor very high has diminishing value compared to raising several factors together.
What is the Genshin damage formula?
The complete non-transformative formula is: Damage = Base ATK × (1 + ATK%) + Flat ATK, then multiplied by Skill Multiplier, then by (1 + Total DMG Bonus), then by the CRIT factor (1 + CR × CD for the expected value, or 1 + CD for a guaranteed crit), then by the reaction multiplier (1.5 for Vaporize, 2.0 for Melt, scaled further by Elemental Mastery), then by the DEF multiplier — (Character Level + 100) ÷ ((Character Level + 100) + (Enemy Level + 100) × (1 − DEF Shred)) — and finally by the RES multiplier, which is 1 − RES above 0, 1 − RES/2 below 0, and 1/(1 + 4×RES) when RES is 0.75 or higher.
How accurate is this Genshin damage calculator?
The math follows the official damage formula, so against a target with the same level, resistance and buffs you set, results should match the in-game number within a point or two — the small gap comes from hidden rounding in the game. The bigger source of error is input: if your artifact sub-stats, talent level, or active buffs are entered slightly differently from your real build, the result will drift. Always double-check that the character level, enemy level, elemental resistance and reaction state match your actual test.
How does Elemental Mastery affect damage?
Elemental Mastery scales two different things. For amplifying reactions (Vaporize and Melt), EM multiplies the base reaction bonus by 2.78 × EM ÷ (EM + 1400), so 100 EM adds roughly 18.5% to a Vaporize hit. For transformative reactions (Overload, Bloom, Hyperbloom, Swirl and friends), EM scales by 16 × EM ÷ (EM + 2000). The catch is that EM has steep diminishing returns — the first 100 EM is worth far more than the next 100 — so for reaction carries, balance EM with CRIT and DMG bonus rather than stacking EM alone.
What is the difference between Crit Rate and Crit DMG?
Crit Rate is the chance a hit crits; Crit DMG is how much extra damage a crit deals. Expected damage is 1 + Crit Rate × Crit DMG, so the two multiply each other — this is why the 1:2 ratio is the community rule of thumb: each point of Crit Rate costs twice as much as a point of Crit DMG, so a balanced build maximizes their product. At 60% Crit Rate and 120% Crit DMG, you have a 1.72× crit multiplier; the same total investment pushed to 75% × 150% gives 2.125× — a genuine upgrade from the same budget.
Vaporize vs Melt — which reaction is better?
Melt has the higher raw multiplier (2.0× vs Vaporize’s 1.5× when the right element triggers), but in practice Vaporize teams often deal more sustained damage because Pyro and Hydro applications are easier to keep consistent, letting the reaction trigger on nearly every hit. Melt comps (Ganyu, Wriothesley) hit very hard per shot but are gated by how fast Cryo can be applied. For a single nuke screenshot, Melt wins; for overall team DPS, a well-built Vaporize rotation usually pulls ahead.
How does enemy DEF reduce my damage?
Enemy defense reduces damage by the DEF multiplier: (Character Level + 100) ÷ ((Character Level + 100) + (Enemy Level + 100) × (1 − DEF Shred)). Against a same-level enemy this is exactly 0.5 — you deal half your pre-defense damage. Against a higher-level enemy it drops further, which is why level matters so much. DEF Shred (from Lisa, Ayaka’s C4, Klee’s C2, or Raiden’s C2) directly raises the denominator’s reduction term and is one of the rarest, most valuable buffs in the game.
How does resistance shred work?
Most enemies have 10% resistance to everything (physical enemies often have 70% physical RES). The Viridescent Venerer 4-piece set shreds 40% resistance, dropping a 10% RES enemy to −30%, which flips the multiplier from 0.9 to 1.15 — a roughly 28% damage increase, which is why an Anemo character holding VV is in almost every reaction team. Below 0, each point of shred is worth half, so additional shred past 0 has diminishing returns. Above 0.75 RES the formula changes to 1/(1 + 4×RES), which is why heavily resistant enemies feel nearly immune.
How do team buffs like Bennett work?
Bennett’s Fantastic Voyage adds a large flat ATK bonus based on his base ATK (weapon + level, not artifacts), plus a heal and, at C1+, a 20% ATK bonus. Because flat ATK is added before your ATK% multipliers, Bennett’s buff effectively multiplies your entire attack investment, which is why he is the single most used support. Other core buffs: Kazuha or Sucrose shred 40% RES with VV and add elemental DMG, Zhongli’s shield shreds 20% RES, and the Noblesse Oblige 4-piece adds 20% ATK to the whole team.
How do I compare two weapons?
Set the same character, artifacts, buffs and enemy in this calculator, then switch only the weapon and watch the Expected Damage number. The difference between the two numbers, divided by the old number, is your percentage gain — e.g. going from 40,000 to 46,000 is a 15% upgrade. Pay attention to the secondary stat: a Crit weapon (like The Catch) is often competitive with a 5-star ATK% weapon because CRIT is so scarce. For HP- or DEF-scaling characters, the weapon’s base ATK matters far less than its passive and sub-stat.
What weapon should I use for my character?
It depends on your stats and the rest of your build, which is exactly what this calculator answers. As a starting rule: prioritize a CRIT sub-stat weapon if your Crit Ratio is unbalanced, an ATK% weapon if your ATK is low, and a weapon whose passive matches your playstyle. For Vaporize and Melt carries, Elemental Mastery weapons (Dragon’s Bane, Stringless) can outperform higher-rarity stat sticks. Enter your exact panel and compare — the number, not the rarity, is what matters.
How do I choose artifacts for maximum damage?
Start from the artifact set that matches the reaction you play (Crimson Witch for Vaporize Hu Tao, Blizzard Strayer for Freeze Ayaka, Emblem for burst DPS). Then get the correct main stats: ATK%/HP%/EM sands depending on scaling, an elemental DMG goblet, and a Crit circlet. Finally balance sub-stats toward a 1:2 Crit Ratio while keeping enough ER to burst on cooldown. This calculator’s preset panel shows each popular character’s recommended set and main stats so you can start from a proven template.
How much Crit Rate should I have?
Aim for at least 60% Crit Rate on a main DPS, and ideally 70-75% before external buffs. Below 60%, your damage feels inconsistent because most of your Crit DMG investment sits idle on non-crits. Blizzard Strayer Freeze builds can stop at 45% because the set and Cryo Resonance add up to 55% more against frozen enemies. Above 100% is wasted — this calculator caps Crit Rate at 100% automatically.
Why is my damage lower than I expected?
The three most common culprits are enemy level, resistance, and missing buffs. If you test against a level 90+ enemy instead of a low-level Hilichurl, the DEF multiplier alone cuts your damage roughly in half. Physical damage against Ruin Guards (70% RES) is also brutal. Finally, team buffs — VV shred, Bennett, Noblesse — are part of the "screenshot" numbers you see online; without them your hit will look much smaller. Replicate the exact enemy and buffs in this calculator and the gap should close.
What is a "damage per screenshot" or nuke build?
A nuke build maximizes one single amplified hit — usually a Melt or Vaporize burst — for the biggest number possible, often at the expense of Crit Rate and consistent DPS. It stacks Crit DMG extremely high, feeds the carry Bennett + Kazuha + a reaction enabler, and relies on fishing for the crit. These builds look impressive but are not representative of real team damage; use the Expected Damage figure here (which averages in Crit Rate) if you want a number that reflects actual output over time.
How can I increase my damage?
In rough order of return: level your main talent to 9 or 10, level the character to 90 for reaction and DEF scaling, fix your Crit Ratio toward 1:2, run an Anemo unit with Viridescent Venerer, add Bennett or an equivalent buffer, and level your weapon to 90. Artifact sub-stat farming comes last because it has the worst return per resin — a talent level is a guaranteed 6-7% gain, while a good artifact roll is a lottery. Swapping one weapon at a time in the calculator shows which change actually moves your number.
Which matters more, character level or talent level?
Talent level usually wins for raw damage per resource: each talent level is a guaranteed 6-7% multiplier increase on that skill. Character level matters most for reaction-based and DEF-scaling characters because the DEF multiplier and transformative reaction base damage both scale with level; going 80→90 raises transformative damage by roughly 34%. For a pure ATK/CRIT carry, level 80/90 with level 9 talents beats level 90 with level 6 talents.
What is the best free-to-play weapon?
The Catch (from Inazuma fishing) is the best free polearm and competitive with 5-stars on Raiden Shogun and Xiangling. For bows, the craftable Prototype Crescent and Hamayumi are solid. In general, free weapons that provide a CRIT sub-stat or a strong, always-on passive (The Catch, Fleuve Cendre Ferryman, the craftable Sapwood Blade for Dendro supports) beat higher base-ATK weapons with useless passives. Use this calculator to check whether your free option is close to a 5-star before you spend pulls.
How do elemental reaction multipliers work?
Amplifying reactions multiply your entire hit: Vaporize is 1.5× when Pyro triggers on Hydro (or 2.0× reverse-Vaporize when Hydro triggers on Pyro), and Melt is 2.0× when Pyro triggers on Cryo (1.5× reverse). Elemental Mastery further scales this bonus by 2.78 × EM ÷ (EM + 1400). Transformative reactions instead deal a separate fixed hit that ignores the attacker’s ATK and talent multiplier and scales only with level, EM, and enemy RES — which is why Hyperbloom and Burgeon teams build full EM and ignore CRIT entirely.
What are transformative reactions and how much do they hit for?
Transformative reactions — Overload, Superconduct, Electro-Charged, Swirl, Bloom, Hyperbloom and Burgeon — deal their own damage independent of ATK and CRIT. Their damage = Level Multiplier × base reaction coefficient × (1 + EM bonus + reaction bonuses) × RES multiplier. At level 90 the level multiplier is 1446.85, so a Hyperbloom (coefficient 3) with 800 EM deals roughly 24,000 before resistance. Because they ignore CRIT, they are cheap to build and scale purely with EM and character level.
How do Aggravate, Spread, Hyperbloom and other Dendro reactions work?
Dendro introduced two families. Quicken (Aggravate and Spread) adds a flat damage bonus to the triggering Electro or Dendro hit that scales with level and EM but still benefits from CRIT and DMG bonus — so those characters build a normal CRIT set with an EM sands. Bloom-family reactions (Bloom, Hyperbloom, Burgeon) are transformative: they ignore CRIT entirely and want maximum EM and level on the single trigger character. The two families want opposite builds, so identify which reaction your team actually triggers before farming.
How is Raiden Shogun damage calculated?
Raiden’s burst converts her Energy Recharge into DMG bonus and her skill provides burst DMG bonus, so ER is effectively a damage stat on her — which is why Emblem of Severed Fate and Engulfing Lightning are her best set and weapon. Her first Musou Shinsetsu slash has one of the highest multipliers in the game (over 700% at talent 10 with full Resolve stacks). Feed her Bennett’s ATK buff, Kazuha’s VV shred, and a Sara or Fischl, and her initial slash is where the screenshot numbers come from.
What is the highest single hit possible in Genshin Impact?
The practical answer is a Melt or reverse-Vaporize burst from a hyper-invested carry against a heavily debuffed, low-resistance target — historically Eula’s physical burst and Hu Tao’s Melt burst have set community records in the millions. Zhongli’s Planet Befall has the highest raw single-hit multiplier (900% at talent 10) but has no amplifying reaction, so its ceiling is lower. The "highest hit" is mostly a showcase of buff stacking and luck, not a realistic build target.
Is EM or ATK% better for Hu Tao?
For a Vaporize Hu Tao, Elemental Mastery is usually better until you have roughly 100-200 EM, because her low base ATK makes ATK% scale poorly while her HP conversion already covers attack. Past that point, Crit and HP% pull ahead of both. A common optimal sands is HP% or EM with EM sub-stats, depending on your weapon — if you run Dragon’s Bane (which grants EM), an HP% sands is best; with Staff of Homa, an EM sands often wins. Set your exact weapon in the calculator and compare the damage number with each option.
What is the difference between DPS and single-hit damage?
Single-hit damage is one number; DPS averages damage over a full rotation including cooldowns, energy, and how many hits land. A character with a huge burst but long downtime can have a lower DPS than a character with smaller but constant hits. This calculator reports per-hit and expected damage (which averages crits) — it does not yet model full rotation DPS. When comparing, keep the same skill and reaction so the comparison is apples-to-apples.
What enemy should I test my damage against?
The community standard is a level 90 enemy with 10% resistance — the "generic" benchmark — because it removes enemy-specific variance. Real bosses and the Spiral Abyss have higher effective HP and some have elevated resistances, so your in-abyss numbers will look smaller. If you want to compare builds fairly, always test against the same enemy at the same level; this calculator always tests against a generic level-90 target with 10% resistance, so results stay comparable.
Does weapon refinement matter for damage?
Yes, and the value depends on the weapon’s passive. Refinements raise the passive effect — for a stat-stick like Staff of Homa the difference between R1 and R5 is modest, but for passive-driven weapons (The Catch’s burst bonus, Favonius’ energy generation) each refinement is a meaningful jump. As a rough guide, going from R1 to R5 on a strong 5-star passive is typically a 10-25% final damage increase depending on how much of the passive you can actually trigger.
How often is this data updated?
Character base stats, weapon stats, and multipliers are maintained against the live game and updated within 48 hours of each version patch. New characters and weapons are added when they release. Because the damage formula itself rarely changes, most updates are data refreshes — the calculation engine stays the same. The version this snapshot targets is listed in the page header; if a new character is missing, check back shortly after the patch.
Is this calculator affiliated with HoYoverse?
No. This is an independent fan-made tool and is not affiliated with, endorsed by, or sponsored by HoYoverse, miHoYo, or Cognosphere. Genshin Impact and all related characters, weapons, and assets are the property of their respective owners. The tool is free, does not require an account, and never asks for your password. Everything you enter stays in your browser.
What is the best build for Raiden Shogun?
Raiden Shogun wants the Emblem of Severed Fate 4-piece set, an Energy Recharge sands, an Electro DMG (or ATK%) goblet, and a Crit circlet. Her best weapon is Engulfing Lightning, with The Catch as the outstanding free alternative. Because her kit converts Energy Recharge into DMG bonus, aim for roughly 220-250% ER while keeping a 1:2 Crit ratio around 60/120 before buffs. Stat priority: ER (until enough to burst on cooldown) > Crit Rate/DMG > ATK%. Put Raiden in the calculator alongside Bennett and Kazuha to see how much their buffs add to her number.
What is the best build for Hu Tao?
Hu Tao runs Crimson Witch of Flames 4-piece (or Shimenawa’s Reminiscence), with an HP% or Elemental Mastery sands, a Pyro DMG goblet, and a Crit circlet. Staff of Homa is her best weapon; Dragon’s Bane and Deathmatch are the best 4-star options. Because her base ATK is the lowest in the game (106), ATK% is nearly worthless on her — HP and EM scale far better. Aim for 30k+ HP, 100-200 EM, and a 70/140 or better Crit ratio. She must stay below 50% HP to activate her A4 Pyro DMG bonus, which is why she pairs so well with Zhongli’s shield instead of a healer.
What is the best build for Neuvillette?
Neuvillette wants Marechaussee Hunter 4-piece (the set alone grants up to 36% free Crit Rate), an HP% sands, a Hydro DMG goblet, and a Crit DMG circlet. Tome of the Eternal Flow is his signature; the craftable Prototype Amber is a strong free option. Because he scales entirely off HP, stack HP% and Crit DMG while keeping Crit Rate around 40-64% (the set and a Crit weapon cover the rest). A typical target is 35k+ HP and a 64/250 Crit ratio. He is self-sufficient enough to solo-carry, so his teams mostly add off-field damage and interruption resistance.
What is the best build for Furina?
Furina builds Golden Troupe 4-piece for maximum off-field skill damage, with an HP% sands, a Hydro DMG goblet, and a Crit circlet. Splendor of Tranquil Waters is her signature; Fleuve Cendre Ferryman (the Fontaine fishing sword) and Festering Desire are the best free options. She scales off HP and wants enough Energy Recharge (180-220% depending on team) to keep her Burst up, plus a healthy Crit ratio. Her Burst’s team-wide DMG bonus makes her one of the highest-value characters in the game — farm her ER first, then HP and Crit.
What is the best build for Arlecchino?
Arlecchino uses Fragment of Harmonic Whimsy 4-piece, an ATK% sands, a Pyro DMG goblet, and a Crit circlet. Crimson Moon Semblance is her signature; Deathmatch and White Tassel are the best 4-star options. She cannot be healed in combat, so her Bond of Life mechanic rewards aggressive play. Aim for a 70/140+ Crit ratio and 2,000+ ATK, and remember she wants a shielder rather than a healer in the team. Her Vaporize teams (with Xingqiu or Yelan) and Overload teams (with Chevreuse) both perform strongly.
What is the best build for Mavuika?
Mavuika, the Pyro Archon, builds Obsidian Codex 4-piece, an ATK% or EM sands, a Pyro DMG goblet, and a Crit circlet. A Thousand Blazing Suns is her signature claymore; Serpent Spine is an excellent 4-star alternative. She wants high ATK and Crit (a 70/160+ ratio) with some EM for her Vaporize and Melt nukes. Her Burst is one of the strongest single hits in the game, so the reference panel here uses her burst multiplier — add a Hydro teammate for Vaporize and Bennett for the ATK buff to see the full screenshot potential.
What is the best build for Navia?
Navia builds Nighttime Whispers 4-piece (or Archaic Petra + ATK% 2-piece sets), an ATK% sands, a Geo DMG goblet, and a Crit circlet. Verdict is her signature; Serpent Spine and Wolf’s Gravestone are strong alternatives. She scales off ATK and Crit, and her damage is loaded into her Skill’s crystallize-powered shotgun blasts. Aim for 70/150+ Crit and 2,200+ ATK, and run her with a second Geo unit plus two elemental teammates to generate the crystallize shards her Skill consumes.
What is the best build for Kazuha?
Kazuha’s support build is Viridescent Venerer 4-piece with an Elemental Mastery sands, goblet, and circlet — as much EM as possible (800-1000). Freedom-Sworn is his best weapon; Iron Sting and Favonius Sword are the best free options. His value comes from two things: the VV set’s 40% RES shred and his A4 passive that converts EM into an elemental DMG bonus for the whole team. He also needs enough ER (160-180%) to burst every rotation. This is why he is in almost every reaction team — no other single character adds so much team damage.
What is the best build for Nahida?
Nahida builds Deepwood Memories 4-piece, an Elemental Mastery sands, an EM goblet (or Dendro DMG if you reach high EM elsewhere), and an EM or Crit circlet. A Thousand Floating Dreams is her signature; Sacrificial Fragments and Magic Guide are the best 4-star options. Aim for 800-1000 EM while keeping enough Crit to make her Tri-Karma Purification hits matter. She is the single best Dendro enabler in the game — her skill links enemies and applies Dendro with near-perfect uptime, making her core to Hyperbloom, Aggravate, Spread, and Burgeon teams alike.
What is the best build for Zhongli?
Zhongli has two builds. As a shield support, run Tenacity of the Millelith 4-piece with full HP% main stats and the Black Tassel to maximize shield strength (50k+ HP). As a burst nuke, run Archaic Petra 2-piece + Noblesse Oblige 2-piece with an HP% or ATK% sands, Geo DMG goblet, and Crit circlet — Staff of Homa is his best nuke weapon. His Planet Befall has one of the highest single-hit multipliers in the game (900% at talent 10), but it has no amplifying reaction, so its ceiling is lower than Melt or Vaporize nukes.
What is the best build for Bennett?
Bennett’s buff scales only off his base ATK (his own base ATK + his weapon’s base ATK), so give him the highest base-ATK sword you have — Aquila Favonia or Mistsplitter Reforged are ideal. Artifacts matter far less: Noblesse Oblige 4-piece is standard for the team-wide 20% ATK bonus. Prioritize Energy Recharge (200%+) so his Burst is always ready, then HP% for stronger healing. Do not farm ATK% artifacts for him — they do not increase his buff at all, because artifact ATK is not base ATK.
What is the best build for Xiangling?
Xiangling builds Emblem of Severed Fate 4-piece, an Energy Recharge or ATK% sands, a Pyro DMG goblet, and a Crit circlet. The Catch is her best free weapon and competitive with 5-stars; Staff of Homa and Staff of the Scarlet Sands are premium options. Because her Pyronado snapshots buffs (it locks in ATK and DMG at cast time), drop Bennett’s Burst first, then cast Pyronado inside it. Aim for 180-220% ER and a 60/120+ Crit ratio. She is widely considered the best 4-star DPS in the game.
Staff of Homa vs Engulfing Lightning — which is better?
They serve different characters. Staff of Homa (CRIT DMG sub-stat, HP + ATK passive) is the universal polearm for Hu Tao, Zhongli, Xiangling and Xiao — it is the best all-round polearm in the game. Engulfing Lightning (Energy Recharge sub-stat) is tailor-made for Raiden Shogun and anyone who converts ER into damage. For Raiden specifically, Engulfing Lightning edges out Homa at equal refinement; for everyone else, Homa wins. To check for your character, pick them in the calculator and switch the weapon between Homa and Engulfing Lightning.
Is The Catch good for Raiden Shogun?
Yes — The Catch is widely considered the best free weapon for Raiden Shogun and Xiangling. At R5 it provides 32% Burst DMG and 12% Burst Crit Rate, which lines up perfectly with Raiden’s Burst-focused kit. A max-refined The Catch performs within roughly 10-15% of Engulfing Lightning on most builds, making it one of the best return-on-effort weapons in the game. You get it entirely free by fishing in Inazuma. The catch (pun intended): farming the R5 takes a few hours of fishing.
Is Staff of Homa worth pulling for?
Staff of Homa is the highest-value weapon in Genshin Impact because of how universal it is — it is BiS or near-BiS on Hu Tao, Zhongli, Xiangling, Xiao, Raiden and almost every other ATK- or HP-scaling polearm user. Its CRIT DMG sub-stat is always useful and its HP + ATK passive activates for every character. If you only pull one weapon banner in your account, this is the strongest single choice. The main downside is the weapon banner’s pity system, which is less forgiving than the character banner.
Are constellations worth it in Genshin Impact?
It depends entirely on the character. Some constellations are massive power spikes (Raiden C2, Hu Tao C1, Furina C2, Nahida C2) while others are minor quality-of-life improvements. As a rule of thumb, a new character almost always beats a constellation unless that constellation is a well-documented breakpoint. Before pulling, check the specific character’s constellation value: a good C1 or C2 can be a 20-40% damage increase, but most C3-C5 are small. The strongest constellations in the game are those that ignore DEF, add reactions, or remove a kit’s core limitation.
Is Raiden Shogun C2 worth it?
Yes — Raiden’s C2 is widely considered one of the single best constellations in Genshin Impact. It makes her Burst ignore 60% of the enemy’s DEF, which is roughly a 40%+ damage increase on her Burst (DEF shred is one of the rarest and most valuable stats in the game). For context, most constellations are a 5-15% increase, so C2 Raiden is exceptional value. C3 (a +3 Burst talent level) is also strong. If you main Raiden, C2 is the single highest-value vertical investment you can make — far better than refining Engulfing Lightning.
Is Hu Tao C1 worth it?
Hu Tao’s C1 is one of the best quality-of-life and damage constellations in the game. It removes the stamina cost of her charged attacks while her Skill is active, which both increases her damage (more charged attacks per rotation) and makes her dramatically easier to play (no stamina management, better dodging). It is roughly a 15-25% effective damage increase depending on play skill. Combined with her C1, Homa, and a proper Vaporize setup, she becomes one of the strongest single-target carries in the game. C1 is generally recommended before her weapon if you play her on-field.
Which constellation gives the biggest damage increase?
The biggest single-constellation damage spikes in Genshin Impact are: Raiden C2 (ignores 60% DEF, ~40% Burst damage), Nahida C2 (Dendro reactions can crit, huge for Bloom and Quicken teams), Furina C2 (her Burst stacks far faster, unlocking her full team buff), and Hu Tao C1 (removes charged-attack stamina cost). In general, constellations that shred DEF, enable reaction crits, or remove a character’s core limitation are worth far more than flat stat increases. Always verify the specific breakpoint before spending — some characters peak at C1, others at C6.
What changed in Genshin Impact 7.0?
Version 7.0 (“Luna VII” / Everwinter Without Mercy) launched August 12, 2026 and opened the Snezhnaya region. It added the Cryo Traveler, new characters Odette and Alyosha, new Snezhnaya weapons and artifact sets (Scarlet Proof and Heart of the Furnace), new bosses (Immortal Construct and Chimeric Winged Lion), and the new Stellar-Conduct reaction for the Cryo Traveler. As with every patch, the damage formula itself is unchanged — only the character and weapon data expands. This calculator’s data snapshot targets 7.0.
Is this calculator updated for version 7.0?
Yes — the data snapshot targets version 7.0 (the Snezhnaya patch). Character base stats, weapon stats, and talent multipliers are refreshed within 48 hours of each version patch, and new characters are added as they release. The calculation engine itself follows the official damage formula and does not change between versions. If a brand-new character is not yet listed, check back shortly after the patch — new 7.0 characters are added as their exact stats are confirmed.
Who are the new characters in version 7.0?
Version 7.0’s Phase 1 introduced Odette (5-star) and the 4-star Electro character Alyosha, alongside an Arlecchino rerun. The Cryo Traveler also became available by touching a Statue of the Seven in Snezhnaya. Phase 2 features Ineffa and Flins reruns. Earlier 6.x patches added the Nod-Krai and Snezhnaya cast including Lauma, Flins, Aino (the first Hydro claymore), and Lohen. New characters are added to this calculator’s roster as their exact base stats and multipliers are confirmed from the live game.
What is snapshotting in Genshin Impact?
Snapshotting means a deployed ability locks in (“snapshots”) the stats of its caster at the moment it is cast, and keeps those stats for its full duration — even after buffs expire. Xiangling’s Pyronado, Fischl’s Oz, and Beidou’s Stormbreaker all snapshot. This is why the standard rotation is Bennett Burst first, then the snapshottable ability: the ability keeps Bennett’s ATK buff for its entire duration. Not every ability snapshots (Xingqiu’s Raincutter, for example, updates dynamically). Knowing which abilities snapshot lets you stack buffs far more efficiently.
How does Bennett’s ATK buff scale?
Bennett’s Fantastic Voyage adds a flat ATK bonus equal to a percentage of his base ATK — which is his own base ATK plus his weapon’s base ATK only. Artifact ATK, ATK% sub-stats, and food do not count. This is why a high base-ATK sword (Aquila Favonia, Mistsplitter) is so valuable on him and why ATK% artifacts are wasted. His C1 adds a further 20% ATK. Because the buff is flat ATK added before your ATK% multipliers, it effectively multiplies your entire attack investment — which is why he is the most used support in the game.
How does Elemental Resonance affect damage?
Elemental Resonance is the passive bonus from having two characters of the same element. The damage-relevant ones are: Pyro Resonance (+25% ATK), Cryo Resonance (+15% Crit Rate against Cryo-affected or Frozen enemies), Geo Resonance (+15% DMG while shielded), and Hydro Resonance (+25% HP). Pyro and Cryo are the most impactful for carry damage. When comparing builds, remember to include resonance in your target stats — a Freeze Ayaka can run 45% Crit Rate because Cryo Resonance and Blizzard Strayer together add up to 55%.
What is the difference between on-field and off-field DPS?
An on-field DPS (also called a carry or hypercarry) deals damage through normal attacks, charged attacks or a Burst that requires them to stay on the field — Hu Tao, Neuvillette, Raiden and Mavuika are examples. An off-field DPS deals damage while another character is active — Xiangling’s Pyronado, Fischl’s Oz, Yelan’s Burst and Xingqiu’s Raincutter. Most strong teams pair one on-field carry with one or two off-field DPS plus a support, so all four characters contribute damage simultaneously. This calculator reports per-hit damage for whichever character you select — it does not yet sum a full rotation.
Can I calculate DPS (damage per second) instead of damage per hit?
This calculator reports per-hit and expected (crit-averaged) damage for a single skill — it does not yet model full rotation DPS, which would require cooldowns, energy, animation frames and hit counts for every character. For an honest apples-to-apples comparison, keep the same skill, reaction and enemy, and compare the expected damage number. If you need true rotation DPS, pair this calculator with a community spreadsheet or a full team simulator. Per-hit damage is the correct tool for weapon and artifact comparisons, which is what most players actually need.
How do I screenshot damage (nuke showcase)?
A damage-per-screenshot nuke maximizes one amplified hit. The recipe: pick a Melt or reverse-Vaporize Burst (Hu Tao, Mavuika, Childe or Eula for physical), stack Crit DMG extremely high (250%+), then layer Bennett, Kazuha (VV shred + DMG bonus), a reaction enabler, and food/potion buffs. Test against a low-resistance, low-level or debuffed enemy to inflate the number. These builds are not representative of real team DPS — they rely on fishing for the crit and often run under 50% Crit Rate. Use the Expected Damage figure in this calculator if you want a number that reflects actual output over time.
Why do my in-game numbers differ from the calculator?
The most common causes are: (1) enemy mismatch — testing against a different enemy level or resistance than you set here; (2) missing buffs — VV shred, Bennett, resonance and food are part of the “screenshot” numbers you see online; (3) hidden rounding in the game; and (4) the calculator’s reference panel using a talent-10, level-90 preset rather than your exact build. The calculator counts character and weapon only, with no artifacts, so your in-game numbers will be higher; set your own level and weapon to match the rest. If the gap persists, double-check the reaction, enemy resistance and DEF shred settings.